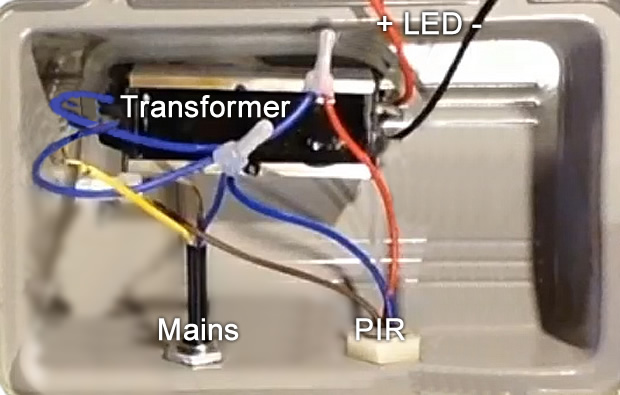
First off, these white things. They’re just connection covers. Just bits of plastic. You can ignore them here.
We can see the mains power coming in at the bottom. The yellow earth cable simply connects to the metal case so again we can ignore that.
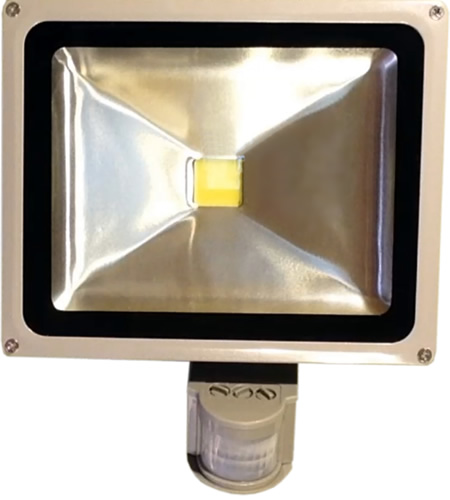
At the very top is our LED (see the red and black cables) and it’s powered by what I’m guess is a transformer and rectifier.
At the bottom is the PIR. That has three wires coming off it. It has a positive (brown wire) and a negative (blue) to power it and it has an output lead, the red one. That’s because the PIR is a switch, a trigger device.
We can see the blue neutral wire comes from the mains supply to the PIR. It also goes to the transformer.
The brown mains positive connects to the PIR, but you’ll note this does NOT connect to the transformer.
Instead the red wire from the PIR connects to a blue wire that in turn connects to the transformer. Now this might seem a little confusing but it really isn’t. If we colour all these wires green, just for convenience, we can see it’s actually the positive output from the PIR going directly to the transformer. Maybe this simplified diagram will help:
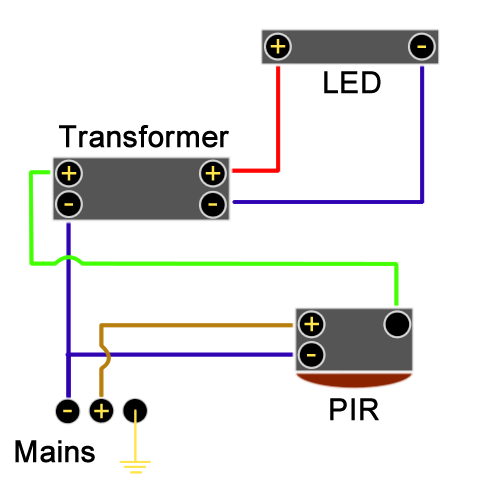
Don’t be concerned by wire colouring. It’s a useful guide but the colour does not always indicate what’s going on inside it.
So how does the circuit work? Simple. Working from positive to negative, the mains comes in directly to the PIR and powers it. This is just a glorified switch. Usually the switch is open, meaning current cannot pass through it, but when it detects movement the switch closes and enables a positive connection to be made to the transformer. From the other side of the transformer the positive flows into and out of the led. The negative flows back to the mains, completing the circuit and lighting the LED.
But I didn’t need the PIR. I just wanted a standard light fitting, so it was necessary to cut the PIR from the circuit. Well, I say “necessary” and that’s not strictly true. Most of these devices have switches on them to circumvent daylight conditions and turn of the PIR. But I preferred to remove the PIR as this would improve the look of the thing and it would also reduce its power consumption.
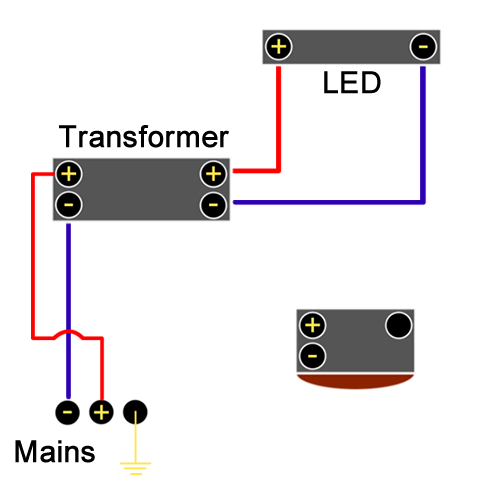
By physically cutting the wires and removing the PIR from the light fitting, it became a simple matter of connecting the mains supply directly to the transformer.
As the upper left transformer wire was blue (suggesting neutral) but was in fact positive (because it was previously powered by the PIR out), I temporarily marked the wire with a piece of tape to remind myself.
The supply cable that came with the light was ridiculously short, so I replaced this.
I spliced the neutrals together and soldered the join. Then I did the same with the positives before apply plenty of insulation tape to both joins.
The yellow and green earth cable needed to be bonding to the metal chassis – and this is an important safety feature that shouldn’t be overlooked. I replaced the previous connection with a more sturdy ring connector, solder this to the earth lead, then bolted through this to the carcass.
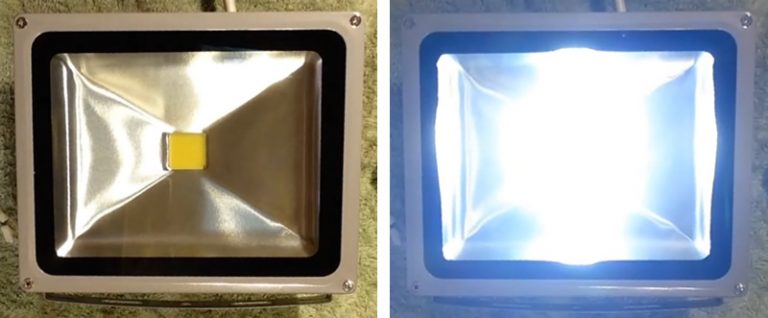
With that done it was just a matter of reassembling the light fitting and testing it. I’m pleased to say it worked a treat.
If you want to see my YouTube video on the subject and see me doing this in real time, simply click below:
 I love my shed, but it’s quite dingy inside. The lights not up to the job and I struggle to see a lot of the time.